Git - 自建代码托管平台
NOTE
GitHub 或 Gitee 平台的私有库只能免费 5 个人,当公司里多人开发一个项目,又不希望公开出去,那么就可以自建代码托管平台:GitLab。
2022-02-08 @Young Kbt
GitLab 简介
GitLab 是由 GitLabInc 开发,使用 MIT 许可证的基于网络的 Git 仓库管理工具,且具有 wiki 和 issue 跟踪功能。使用 Git 作为代码管理工具,并在此基础上搭建起来的 web 服务。
GitLab 由乌克兰程序员 DmitriyZaporozhets 和 ValerySizov 开发,它使用 Ruby 语言写成。后来,一些部分用 Go 语言重写。截止 2018 年 5 月,该公司约有 290 名团队成员,以及 2000 多名开源贡献者。GitLab 被 IBM,Sony,JülichResearchCenter,NASA,Alibaba,Invincea,O’ReillyMedia,Leibniz-Rechenzentrum(LRZ),CERN,SpaceX 等组织使用。
官网地址:
https://about.gitlab.com/安装说明:
https://about.gitlab.com/installation/
GitLab 安装
服务器准备
准备一个系统为 CentOS7 以上版本的服务器,要求内存 4G,磁盘 50G。
关闭防火墙,并且配置好主机名和 IP,保证服务器可以上网。
本内容使用虚拟机:
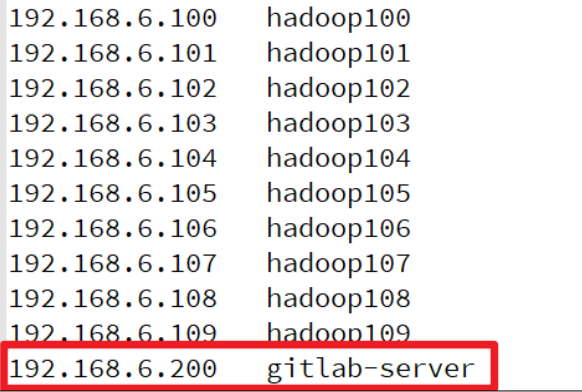
主机名:gitlab-server
IP 地址:192.168.6.200
安装包准备
Yum 在线安装 gitlab- ce 时,需要下载几百 M 的安装文件,非常耗时,所以最好提前把所需 RPM 包下载到本地,然后使用离线 rpm 的方式安装。
下载地址:
https://packages.gitlab.com/gitlab/gitlab-ce/packages/el/7/gitlab-ce-13.10.2-ce.0.el7.x86_64.rpm
编写安装脚本
安装 GitLab 步骤比较繁琐,因此我们可以参考官网编写 GitLab 的安装脚本
vim gitlab-install.sh
# 内容
sudo rpm -ivh /opt/module/gitlab-ce-13.10.2-ce.0.el7.x86_64.rpm
sudo yum install -y curl policycoreutils-python openssh-server cronie
sudo lokkit -s http -s ssh
sudo yum install -y postfix
sudo service postfix start
sudo chkconfig postfix on
curl https://packages.gitlab.com/install/repositories/gitlab/gitlab-ce/script.rpm.sh | sudo bash
sudo EXTERNAL_URL="http://gitlab.example.com" yum -y install gitlab-ce给脚本增加执行权限
chmod +x gitlab-install.sh然后执行该脚本,开始安装 gitlab-ce。注意一定要保证服务器可以上网
./gitlab-install.shGitLab 使用
初始化 GitLab 服务
执行以下命令初始化 GitLab 服务,过程大概需要几分钟,耐心等待 ...
gitlab-ctl reconfigure启动 GitLab 服务
执行 itlab-ctl stop 命令启动 GitLab 服务,如需停止,执行 gitlab-ctl stop 命令
gitlab-ctl start  # 开启服务

gitlab-ctl stop # 停止服务使用浏览器访问 GitLab
使用主机名或者 IP 地址即可访问 GitLab 服务。如果使用主机名访问,则需要提前配一下 Windows 的 hosts 文件
或者通过 IP 地址访问
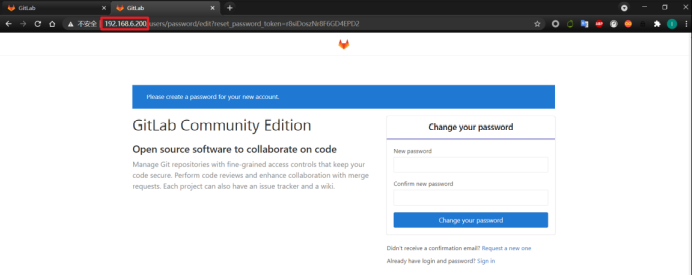
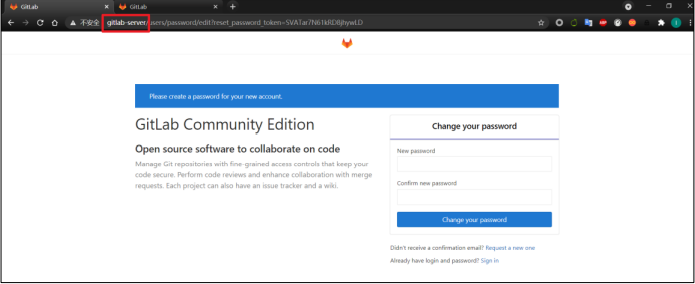
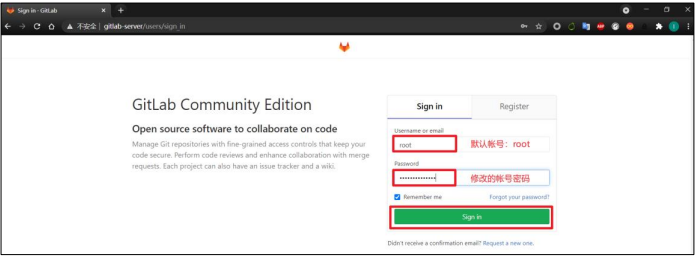
首次登陆之前,需要修改下 GitLab 提供的 root 账户的密码,要求 8 位以上,包含大小写子母和特殊符号。
然后使用修改后的密码登录 GitLab
GitLab 登录成功
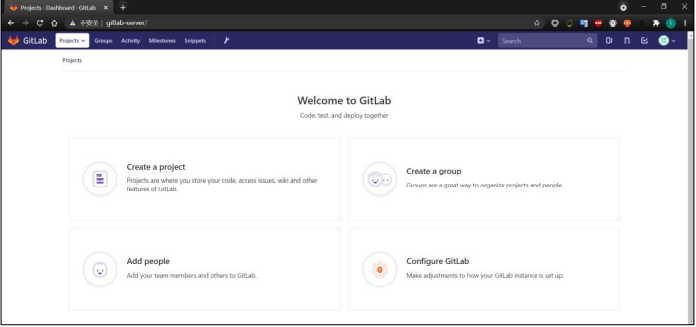
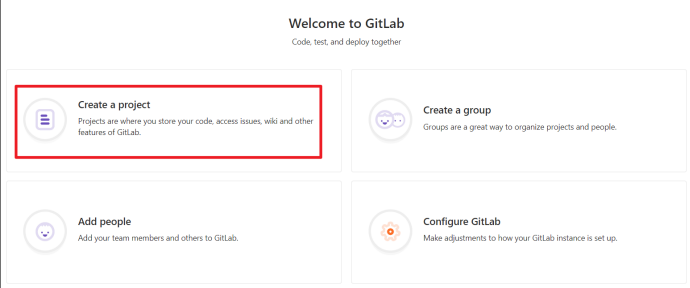
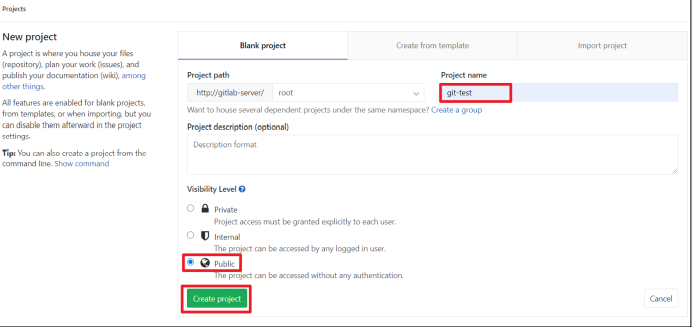
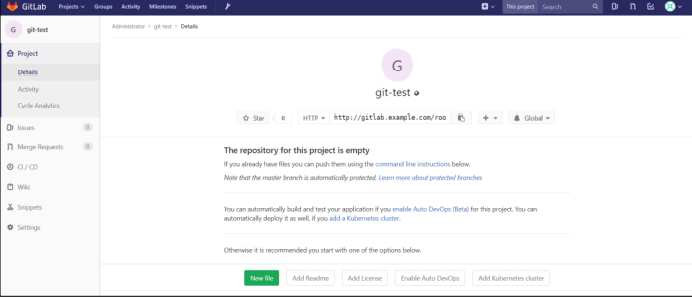
GitLab 创建远程库
IDEA 集成 GitLab
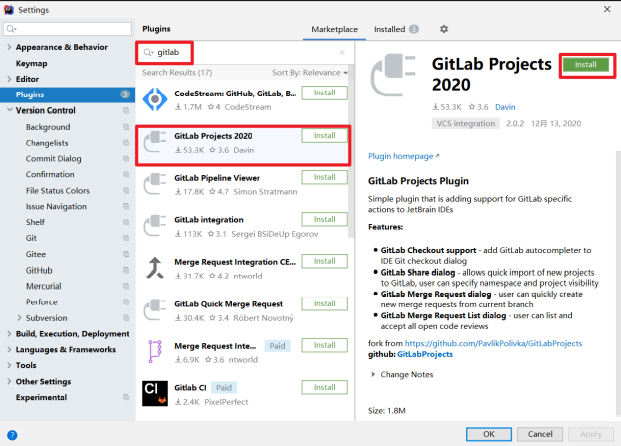
安装 GitLab 插件
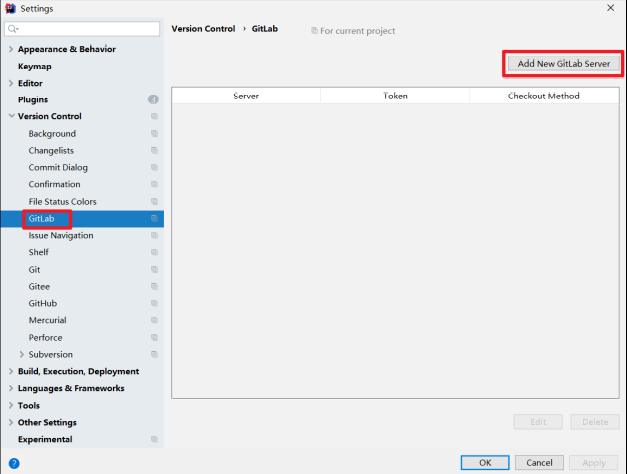
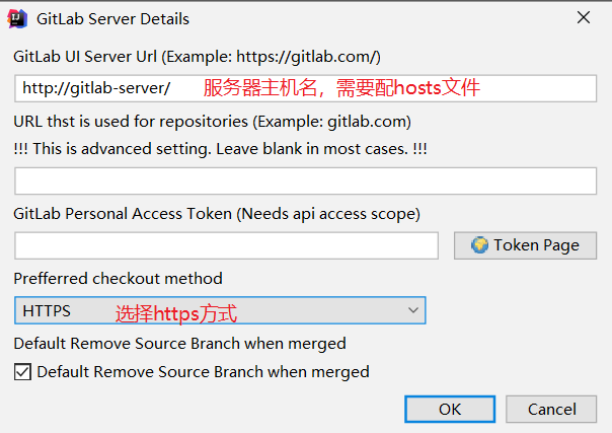
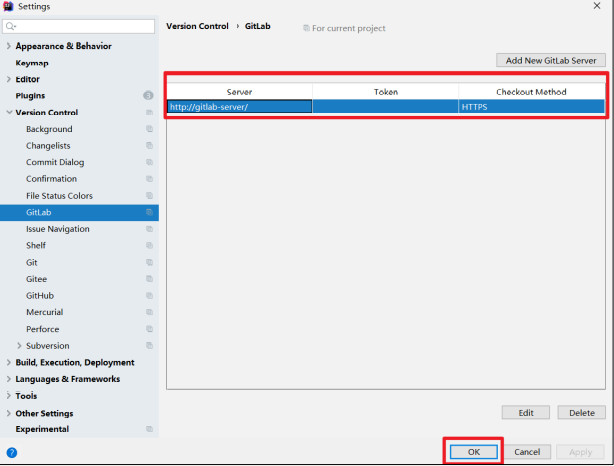
设置 GitLab 插件
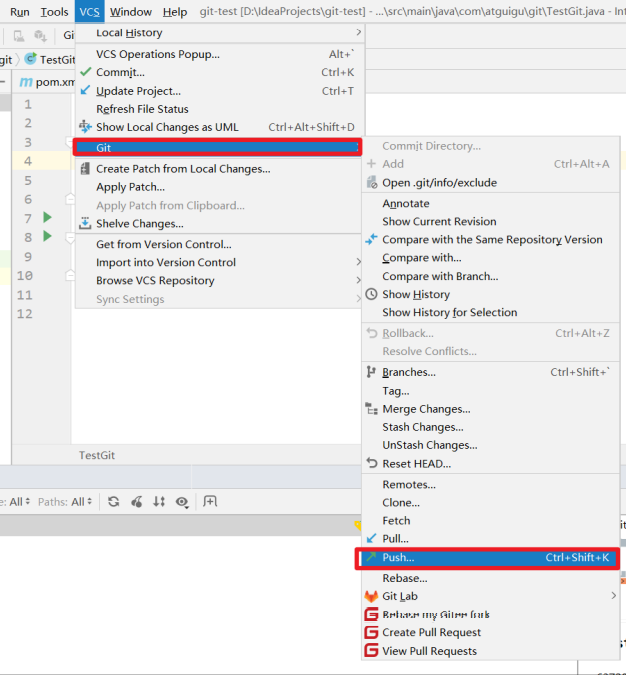
push 本地代码到 GitLab 远程库
自定义远程连接
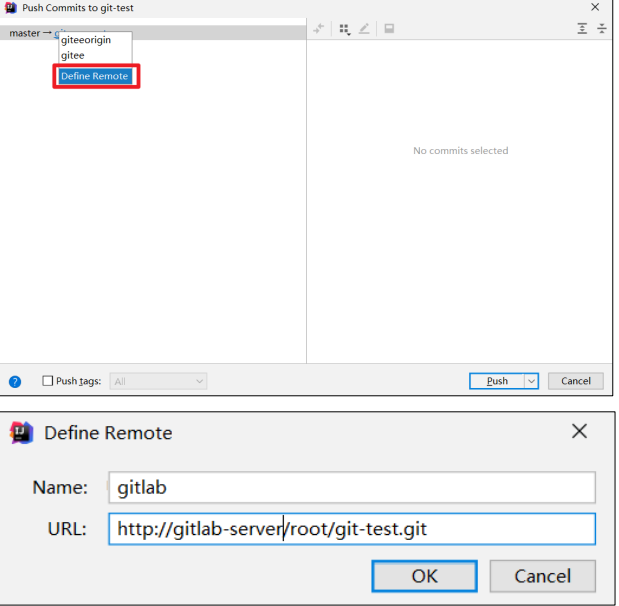
注意:GitLab 网页上复制过来的连接是:http://gitlab.example.com/root/git-test.git,需要手动修改为:http://gitlab-server/root/git-test.git。
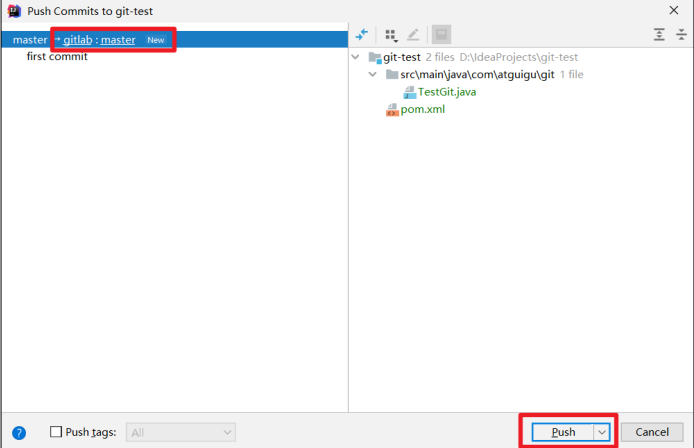
选择 GitLab 远程连接,进行 push
首次向连接 GitLab,需要登录帐号和密码,用 root 帐号和我们修改的密码登录即可
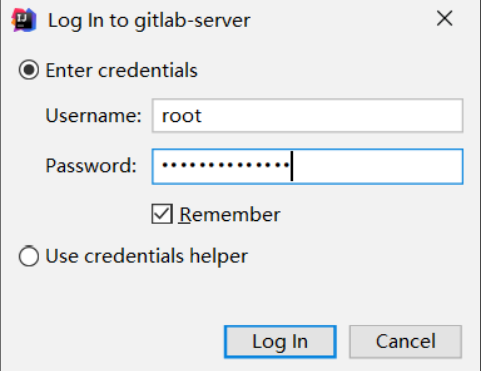
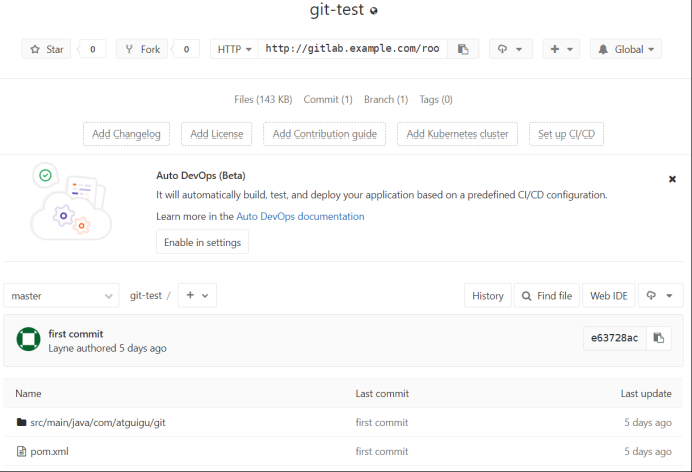
代码 push 成功
只要 GitLab 的远程库连接定义好以后,对 GitLab 远程库进行 pull 和 clone 的操作和 Github 和码云一致,此处不再赘述。